Tutorials
Shape Up on a Kromdraw board
A pitch and a breadboard, drawn rather than written up, on a feature nobody has built yet.
Last updated 29 August 2026
Shape Up is the book Basecamp wrote about how they decide what to build and how they build it. Two of its chapters are about things you draw rather than write. Chapter 4, Find the Elements, is about sketching a solution at a level of detail deliberately too crude to be mistaken for a design. Chapter 6, Write the Pitch, is about the write-up that comes out of it. Both are free to read online, and this tutorial quotes them where it matters.
Everything below happens on one board. The example is a feature that does not exist in Kromdraw and may never: a collection you can look at as a kanban board, where every drawing in it is a card that moves through columns. I picked something unbuilt on purpose, because a technique for thinking is easy to fake once you already know the answer.
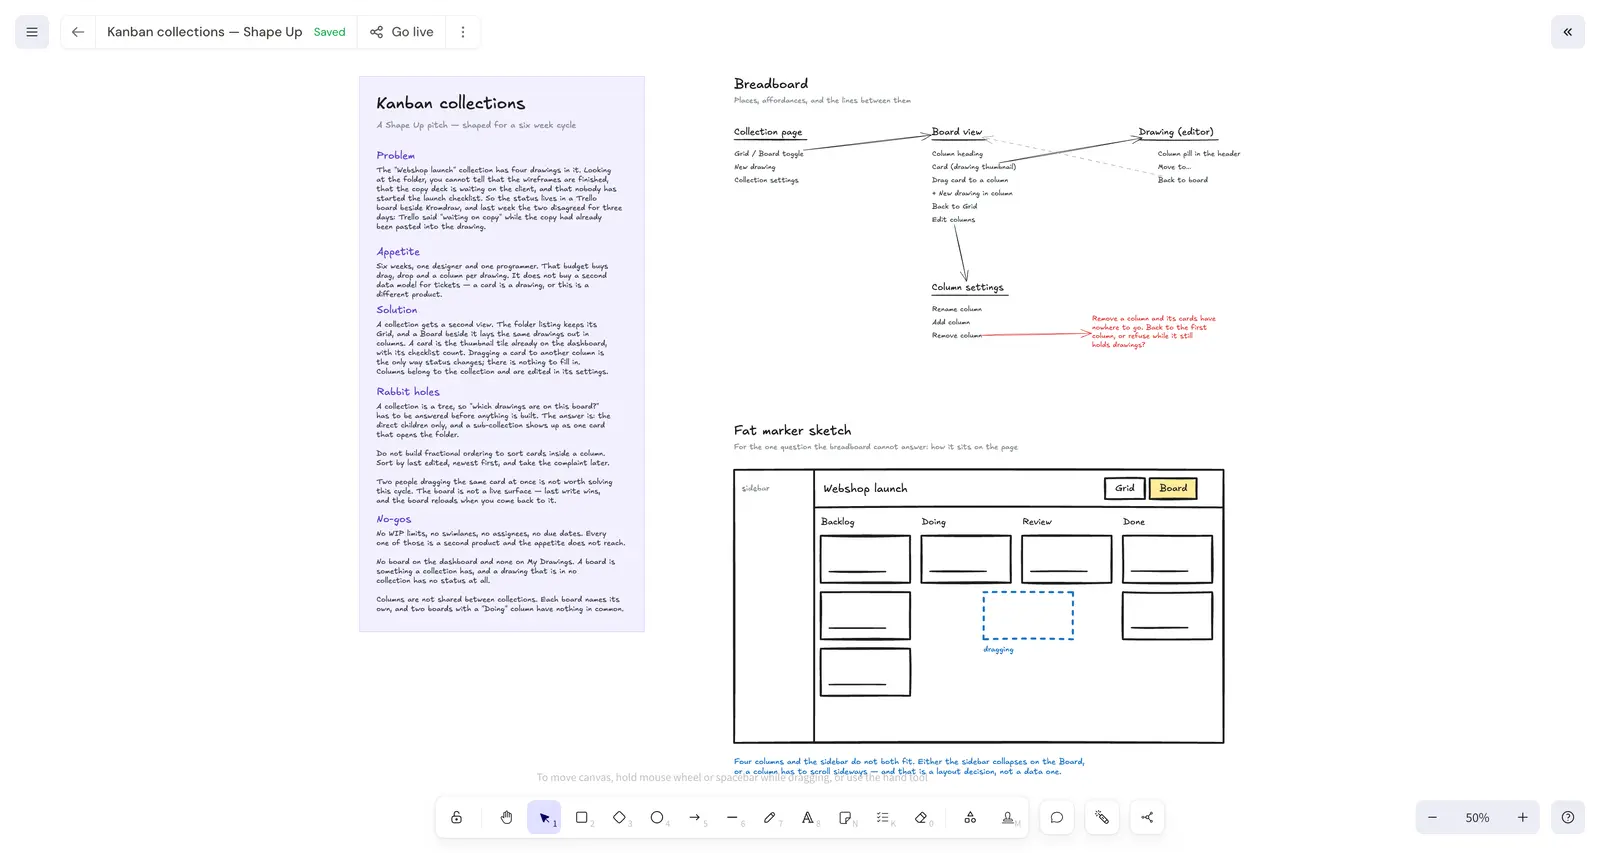
One thing about the order. Shape Up shapes first and pitches second, and that is the right way round when you are doing the work. I have put the pitch first here because it is easier to read a breadboard once you know what it is feeding.
The pitch, as one text block
A pitch is what goes to the people deciding what to work on next. Shape Up says it has five parts, and being strict about all five is the point, because each one exists to end a specific argument before it starts.
Problem
The raw idea or the use case, told as one specific story rather than a category of complaint. The book is blunt about why: "the best problem definition consists of a single specific story that shows why the status quo doesn't work." Without a story you have no baseline, so when the work ships nobody can say whether it helped. Mine is a collection called Webshop launch where the status of four drawings lived in a Trello board next door, and the two disagreed for three days.
Appetite
How much time you want to spend, decided before the solution exists. This is not an estimate, and the difference matters: an estimate starts from a design and produces a number, while an appetite starts from a number and constrains the design. Six weeks here, which is Shape Up's full cycle; two weeks is its small batch.
Solution
The elements you found, written so somebody gets them in one read. A problem with no solution attached is unshaped work, and handing it over pushes the hard thinking onto whoever picks it up — usually in the week they were supposed to be building.
Rabbit holes
The specific places where somebody could disappear for a week. A few sentences each is normal. You are not solving them; you are naming them so that hitting one is a known event rather than a surprise.
No-gos
What this deliberately does not include. This is the part people leave off, and it is the part that makes the appetite believable. Six weeks with no no-gos is a wish.
On the board this is a single text element. Press 8, click where it should start,
and type; the text stays where you put your line breaks, so keep lines to about 65 characters
or the block grows wider than anyone will read. I drew a rectangle behind it and sent it to the
back, which is only there to make the pitch read as a document sitting on the board rather than
as writing that happens to be on it.
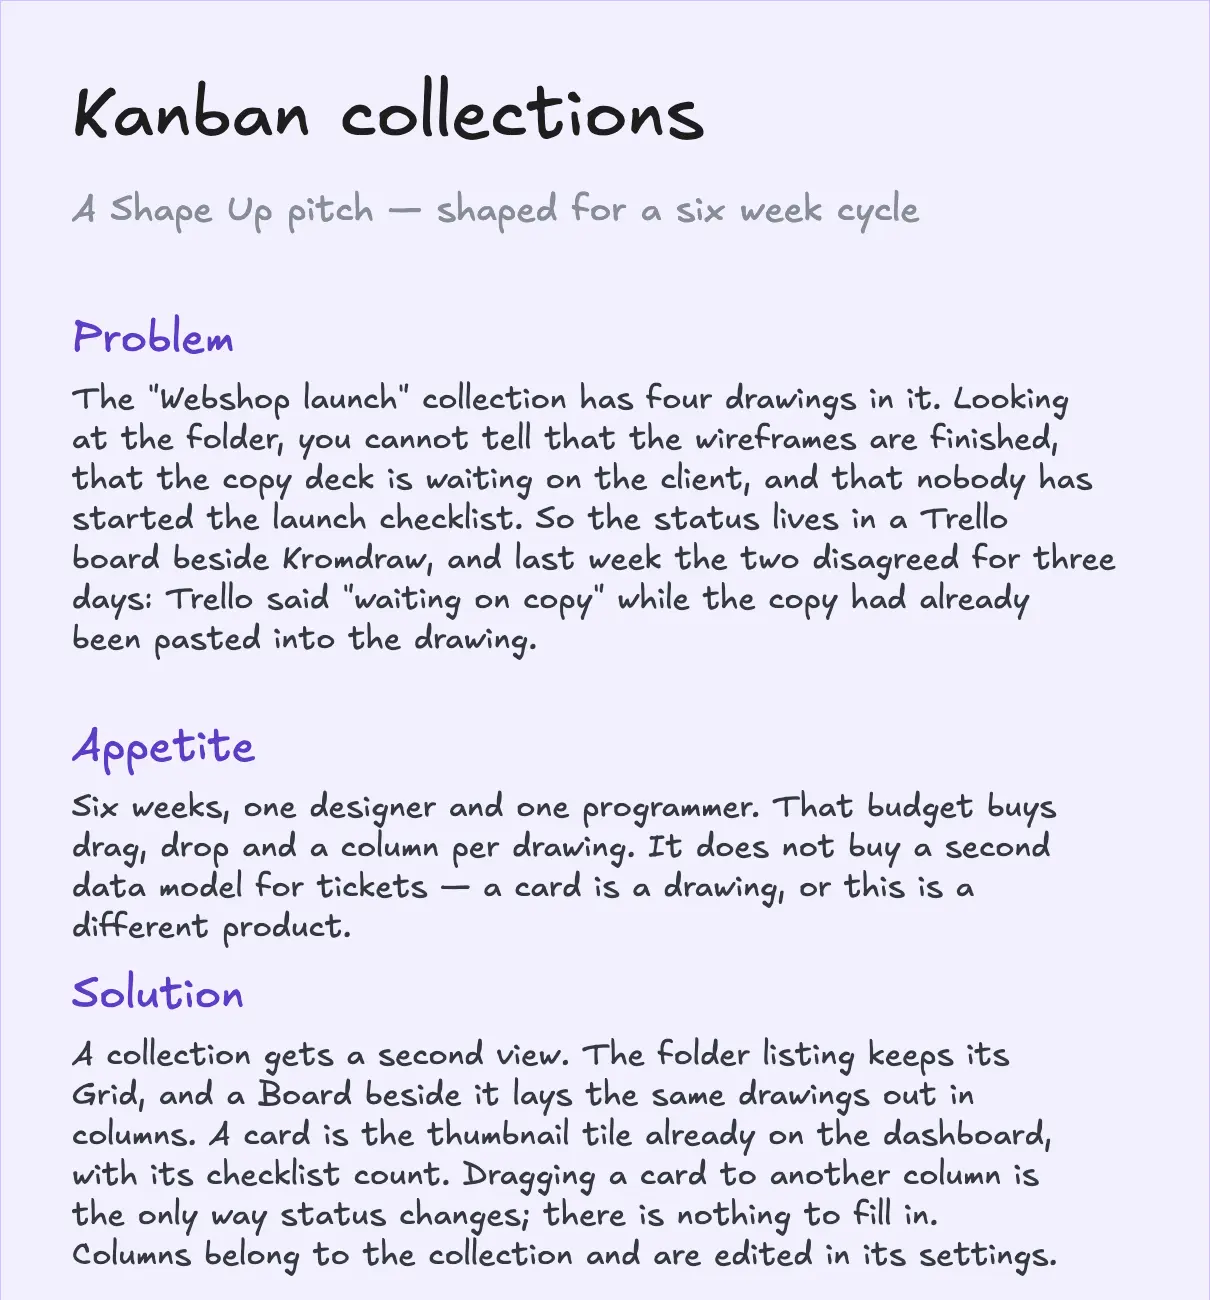
The Appetite paragraph is the one worth copying the shape of:
Six weeks, one designer and one programmer. That budget buys drag, drop and a column per drawing. It does not buy a second data model for tickets — a card is a drawing, or this is a different product.
The second sentence is doing the real work. It names the one design decision the budget forces, which means anybody who later proposes a Ticket model is not making a suggestion, they are asking to change the appetite. That is a much shorter conversation.
Breadboarding
Now the part that produced the Solution paragraph. Chapter 4 has two techniques, and they answer different questions, so it is worth knowing which one you are reaching for. This is the first of them.
A breadboard, in electronics, is a working circuit laid out on a bare board: every component that has to function is there and nothing that only has to look right is. Shape Up borrows the word for a way of sketching software with three kinds of thing in it, and nothing else.
- Places — anywhere you can navigate to. A screen, a dialog, a menu that pops up.
- Affordances — anything you can act on. A button, a field, a link. Shape Up counts interface copy as an affordance too, on the grounds that the words are what tell you the thing is there.
- Connection lines — which affordance takes you to which place.
You write words, not pictures. That is the entire discipline and it is harder than it sounds, because the moment you draw a box that looks like a button you have started deciding what it looks like, and every conversation after that is about the box.
Step one: write the places
Name every place and rule a line under it. Press 8 for text, then 6
for the line tool and drag underneath; hold shift while dragging and it stays level.
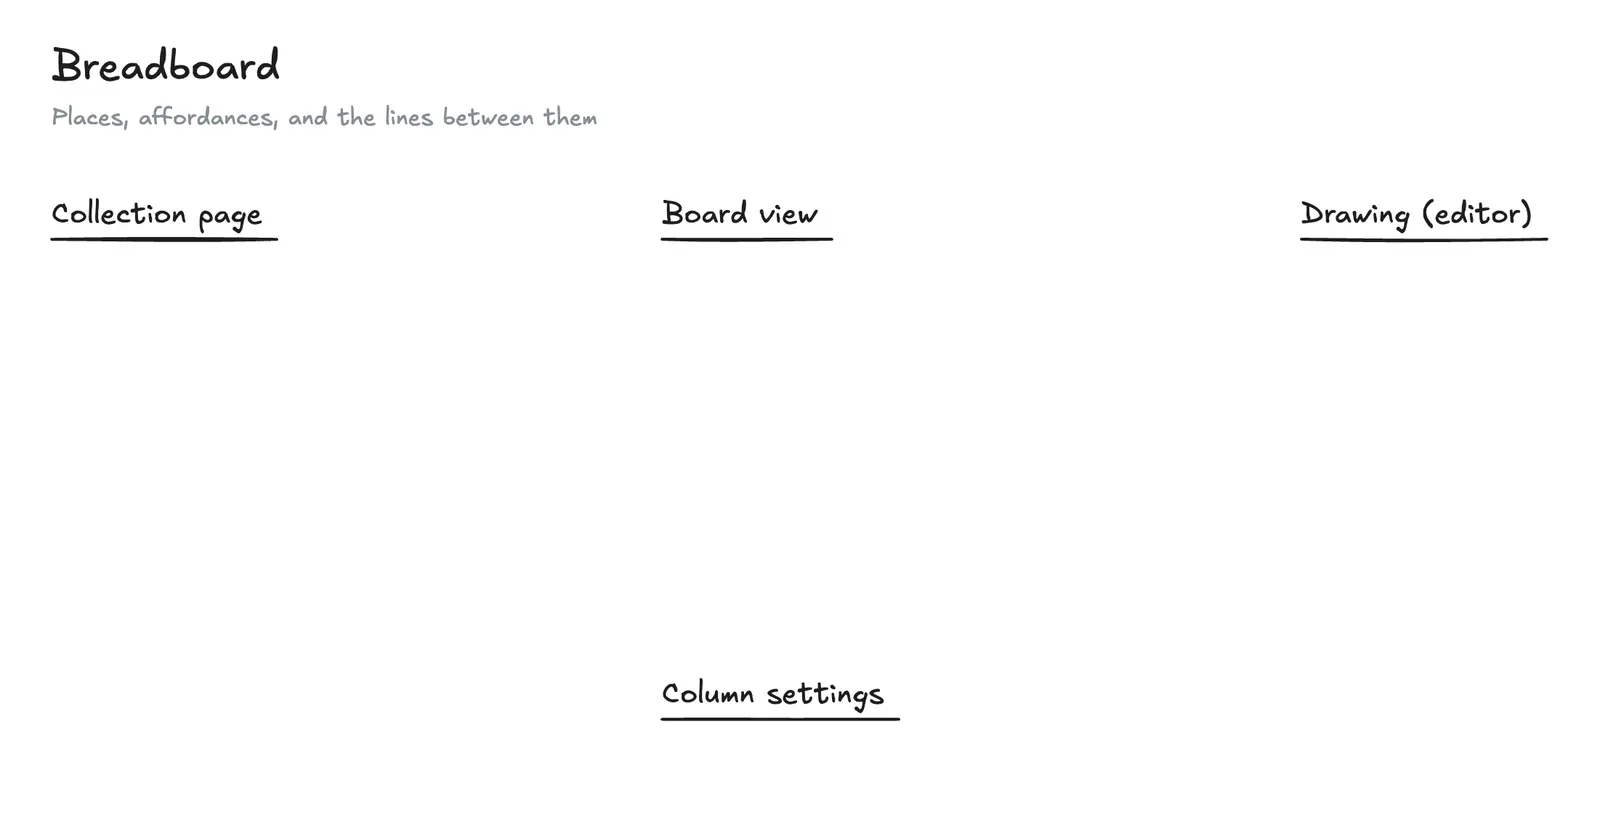
Collection page and Drawing already exist; Board view and Column settings are new. Writing down the ones that were already there is not padding. The questions chapter 4 says you are trying to answer are "Where in the current system does the new thing fit? How do you get to it?", and neither has an answer on a page that only contains the new parts.
Column settings is on the list for a small reason with a large consequence: columns have to be named somewhere, and once you accept that, a place has to exist for it. That place is where the trouble turns up two steps from now.
Step two: list the affordances
Under each place, write what you can act on there. Still words. Card (drawing thumbnail) is an affordance. A rectangle with a picture in it is a design, and you are not doing that yet.
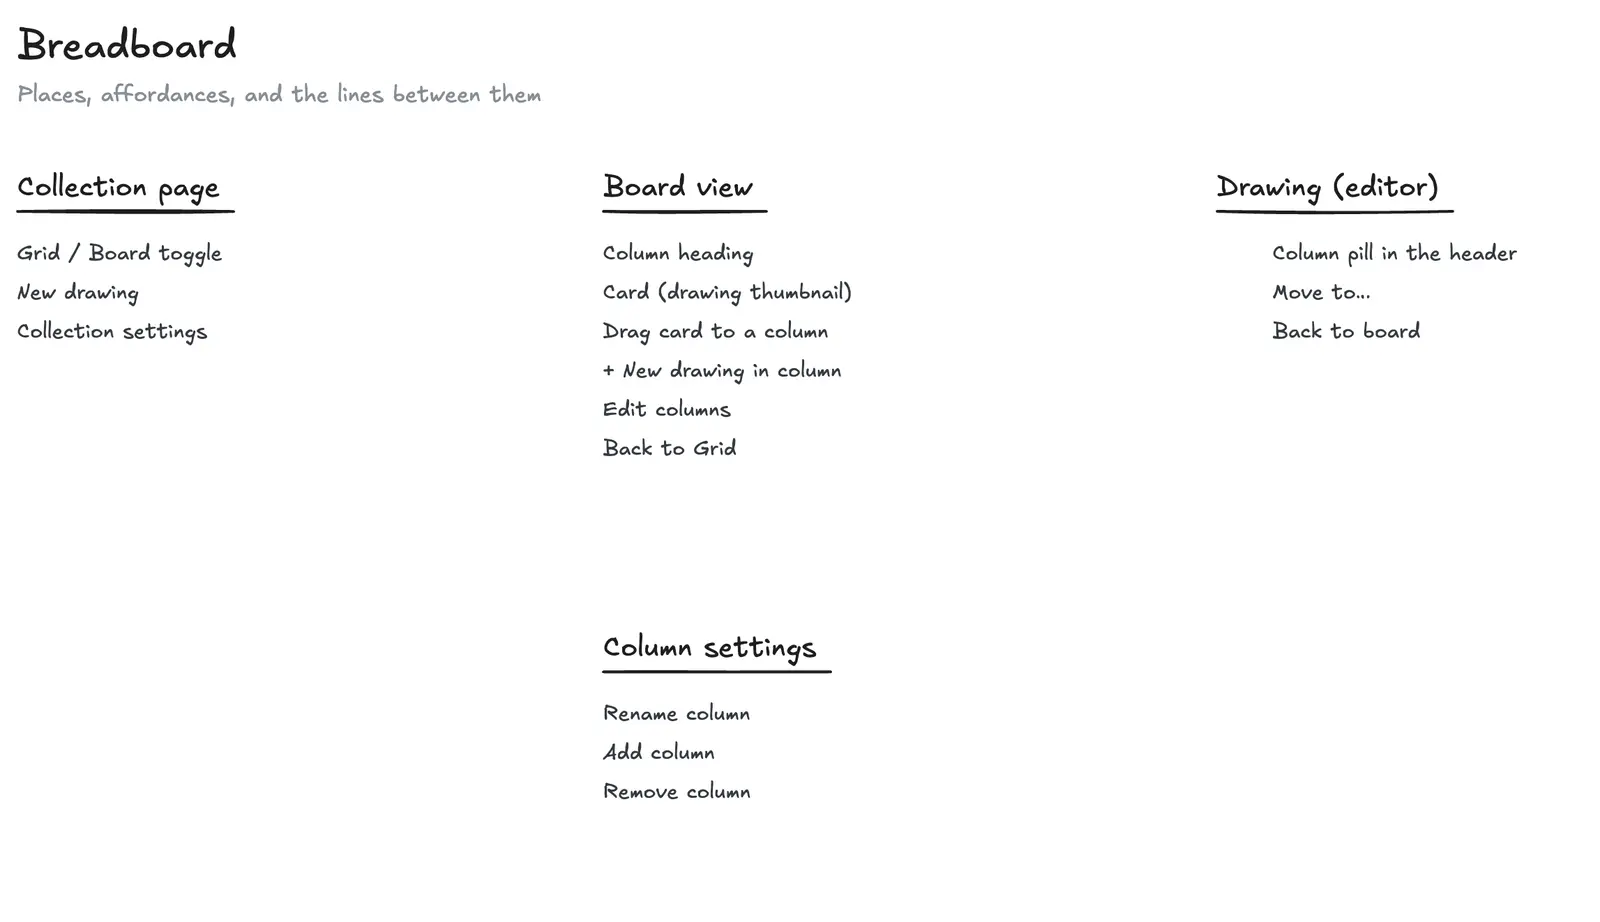
The list under Board view is where the feature actually is. Look at what is missing from it: there is no status dropdown and no Set status field, anywhere on the board. That absence is a decision, and listing affordances is what forced it — if Drag card to a column is on the list and a status field is not, then dragging is the only way status changes, and the pitch now has to say so out loud.
Step three: draw the connection lines
An arrow from an affordance to the place it takes you. Press 5 and drag from the
label to the target. I drew the way back out of the editor as a dashed grey line so that return
paths read differently from forward ones at a glance.
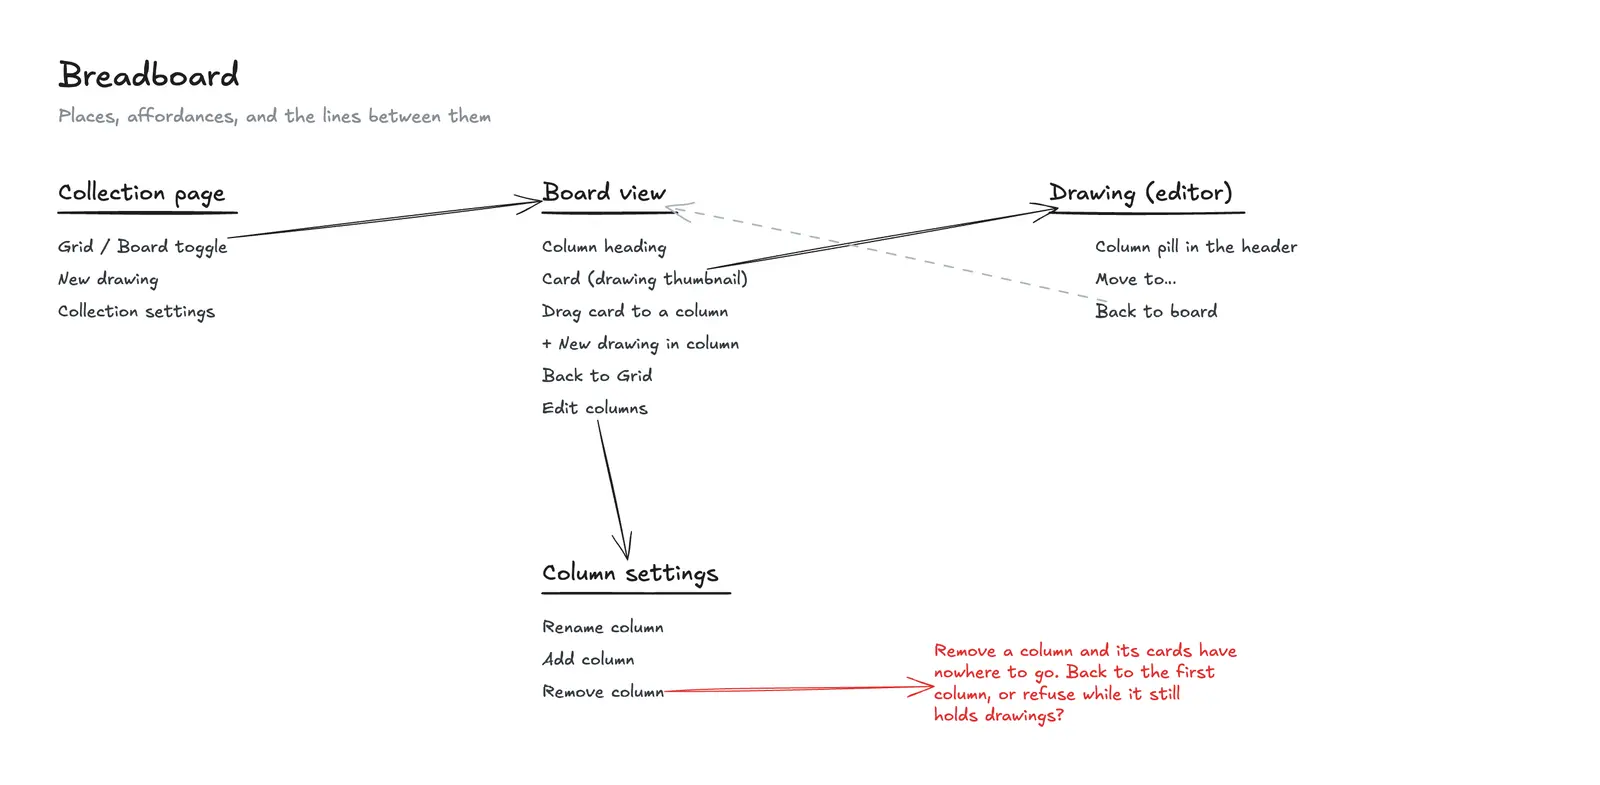
This is where breadboarding earns its keep. Remove column went on the list under Column settings without a thought, because obviously you can remove a column. Drawing the lines out of that place is what makes the hole visible: a column that is removed while it still holds drawings sends those drawings nowhere, and there is no place on the board for them to land.
So it becomes a real decision with three real answers — move them to the first column, refuse the removal while the column is occupied, or make the user pick — and it goes in the pitch as a rabbit hole rather than being discovered in week four by whoever is writing the migration. Shape Up's own worked example does exactly this: breadboarding an autopay feature surfaces "Did we pay the original invoice or not?", a question nobody thought to ask while the feature was still a sentence.
Fat marker sketches
A breadboard says nothing about arrangement, because it has no width. Sometimes arrangement is the actual problem, and that is what chapter 4's second technique is for. A fat marker sketch is drawn with a marker so thick that detail is physically impossible — you cannot fuss over a corner radius with a chisel tip.
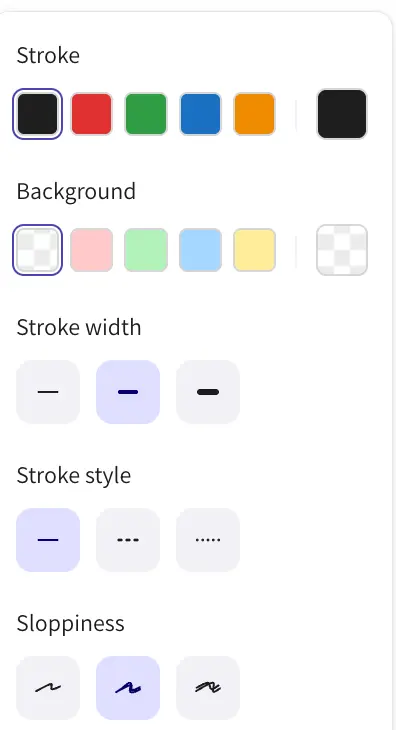
On a screen there is no marker, so you have to impose the constraint yourself. Pick the
rectangle with 2 and set Stroke width to the third and thickest
option in the panel that appears on the left. Everything you draw after that is too coarse to
tinker with, which is the whole benefit.
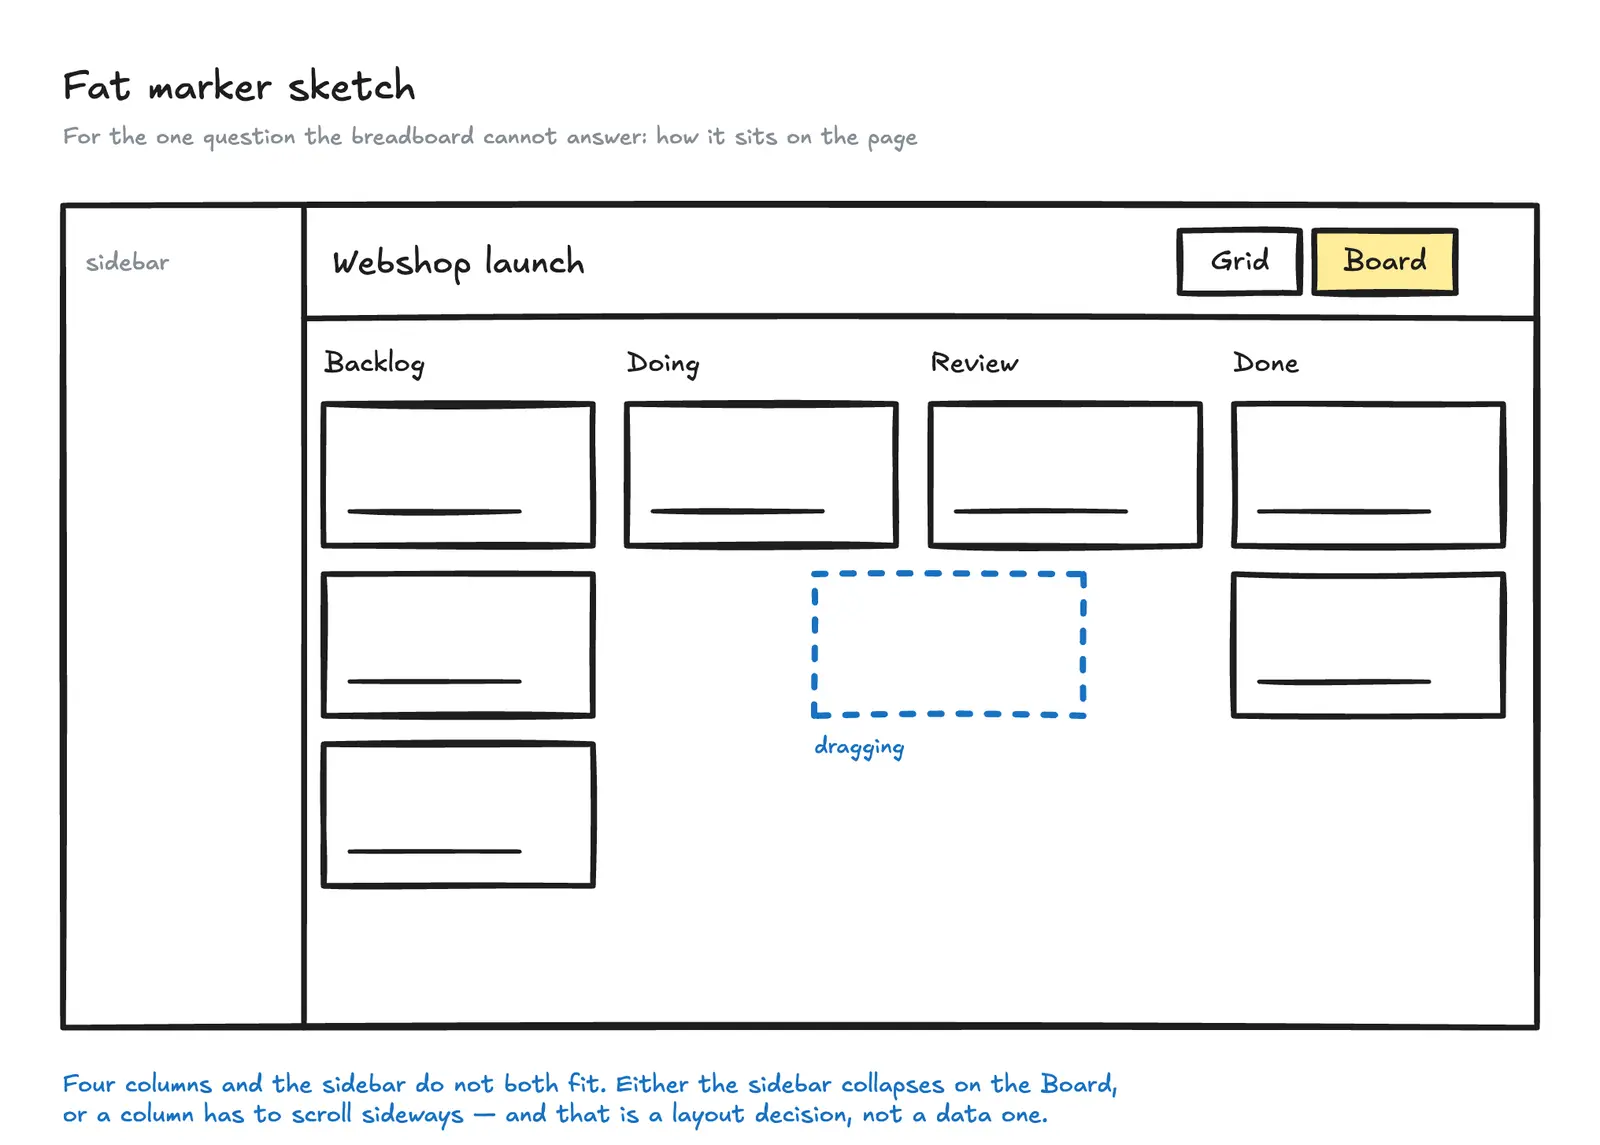
This sketch exists for one question, written under it in blue: four columns and the sidebar do not both fit on a normal laptop, so either the sidebar collapses when you switch to Board or a column has to scroll sideways. That is a layout decision rather than a data one, the breadboard had no way to raise it, and it is cheaper to have the argument now than after somebody has built the drag handling.
Notice what the sketch leaves out. No card has a title on it, there is no colour beyond one highlight, and there is no spacing anybody could measure. Chapter 4 is explicit that this is deliberate — leaving the details out is what "leaves this important room for creativity in the later stages", and a sketch tidy enough to look decided will quietly do the deciding.
Why do this on a board rather than in a document
Two reasons, and only one of them is about drawing.
The first is that a breadboard is a graph. Written as a document it becomes a nested list, and a nested list hides exactly the thing you are looking for — the affordance whose line goes nowhere. The Remove column problem above is visible on the board in about a second and is invisible in prose, because in prose it reads as a perfectly ordinary bullet point.
The second is that the pitch and the sketches want to be in the same place. Shape Up asks for the pitch to be posted where people can read it on their own time and comment before any meeting happens, "not to say yes or no… but to poke holes or contribute missing information". On a board a comment pins to the shape it is about, so "this rabbit hole is bigger than you think" lands on the rabbit hole instead of at the bottom of a thread where nobody can tell which part it answers. Share the board with Go live and people can read and comment without an account.
What a board is worse at is being read in order. If your pitch has to go to eight people who will each open it once, write the pitch in a document and link the board from it. The board is for the shaping.
Doing it yourself
Nothing here needs an account. The editor on the front page is the real one, so you can lay out a breadboard in it right now and see whether the technique suits you before you sign up for anything.
The short version, if you want to work from a list:
- Write the places, one line each, ruled underneath.
- Write the affordances under each place. Words only — the moment you draw a button, stop.
- Draw the connection lines, and pay attention to the affordance whose line has nowhere to go.
- If, and only if, the 2D arrangement is a real question, draw it once with the thickest stroke.
- Write the pitch as one text block: problem, appetite, solution, rabbit holes, no-gos.